Clearly the bed is the main focus of a bedroom. And as the star it totally deserves to be snazzed up a bit! But looking through catalogue after catalogue, one can easily be discouraged after falling in love with one $800+ bed frame after another. There is a new (or maybe revitalized?) trend for upholstered headboards which we love, but we never could find all the reasons to spend our extra dough on one. And then we found DIY directions to make one at home. They claim the project to be fast, economical, and easy to do, and by golly, we are here to support that claim. The basic directions we used can be found here from YoungHouseLove.com, home of two of the best DIYers we've found. We did have to finagle theirs a bit from lack of motivation to find all parts (such as the canvas stretching frame) and a desire to save some money.
So the following is our how-to on making a DIY headboard:
Tools: Saw, Screwdriver, Hammer
Supplies: 3- 72" 1x2 finished pine boards, 4 right angle fasteners, screws, tacks, sandpaper, fabric measured to fit with extra for sides, 1 bag of extra thick batting
Time: 1-2 hours
1. Measure the bed's length and height. We decided to make the frame 36" x 66". That left about 26" above the mattress and a few inches on both sides to anchor the look.
2. Make the frame. Cut 1 board into 2- 36"halves and cut the other 2 down to 66" each. Cut 45 degree angles onto all ends, making sure they correspond appropriately with one another. Peyton marked the ends by numbers to correspond each joint. Sand them down to meet flush at a right angle. Attach with screws using the right angle fasteners.
 |
| At first we tried those wave frame connectors but without a jig to hold the pieces forcefully together they didn't work. You can see Peyton's markings here though. |
 |
| The right angle fastener. |
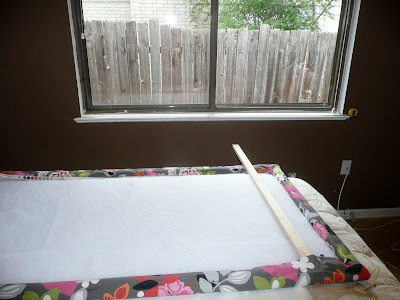
3. Attach the batting and fabric. Stretch the batting over the frame (we doubled it over since we had extra) and attach using tacks or staple gun if handy. It helps to have another person hold the opposite end tight so there isn't slack. Attach one side, move to opposite, and repeat. Once batting is secure attach fabric in same way. We trimmed down the corners a bit once we got there and tried some different folds to figure the best looking way to attach them.
4. Make your bed a happy camper. Add the glitz it's looking for! Since the headboard is so light, if the bed is against the wall you can simply add some nails to the wall and hang it like a frame.
**It was tougher for us because we have it against a window. Peyton simply nailed two more boards to the back, one each right and left of center, that went almost to the floor. He then screwed two thicker 2x4 pieces below the windowsill and attached the boards to that. This way it was secure to the wall and got past the lip of the windowsill.
 |
| One of the supports that Peyton added to attach to wall. |
**Another way, that we should have used since we can't hang ours, is to use plywood. Do the same steps for attaching, but since it is a sheet of wood it will be heavier and will have to be attached to the wall similar to ours.
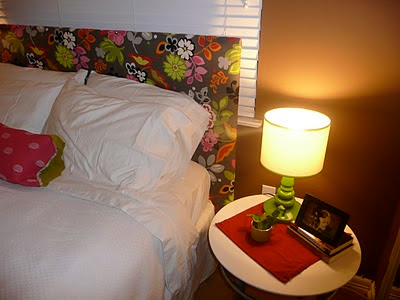
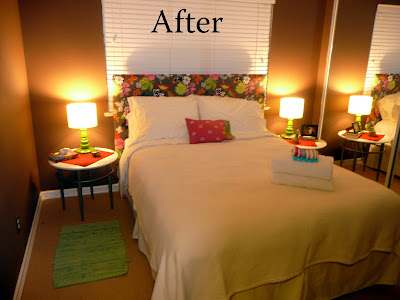
So there you have it! Our first official step into the DIY realm completed. And we are tickled pink with the results. Let's take a look at the before and after.
LIVE THE MURRAYED LIFE


Wow! Looks beautiful. Love the flowers on the head board too ... Did you husband agree in one or did you have to convince him a bit? ;)
ReplyDelete♡ from © tanvii.com
Thanks!! He agreed quickly only because it's the guest room and he just doesn't care much about rooms he doesn't go into often. If it had been less funky/more traditional or in our bedroom, it would have been vetoed swiftly. :) I'm on my way to check your blog out!
ReplyDeleteApparently wrong on that.. He pointed out that he knew it was the one from the get-go yet I still dragged him to two other shops and around for 2 hours before I settled on his first pick. I just lucked out with a beau with similar taste and patience!
ReplyDeleteHhaha! :) That is so sweet! At least do not have to find middle ground on trivial matters. Couple with similar taste and lot of patience are surely made for each other :o)
ReplyDeleteClick here to Win a Dress
♡ from © tanvii.com